Customer satisfaction is critical for a business. Excellent customer support leads to higher customer retention and ultimately more company revenue. Odoo helpdesk team provides your customers with support to queries or errors they might encounter while using their product or services.
Let’s get started !
I have several pieces of information on my Dashboard.
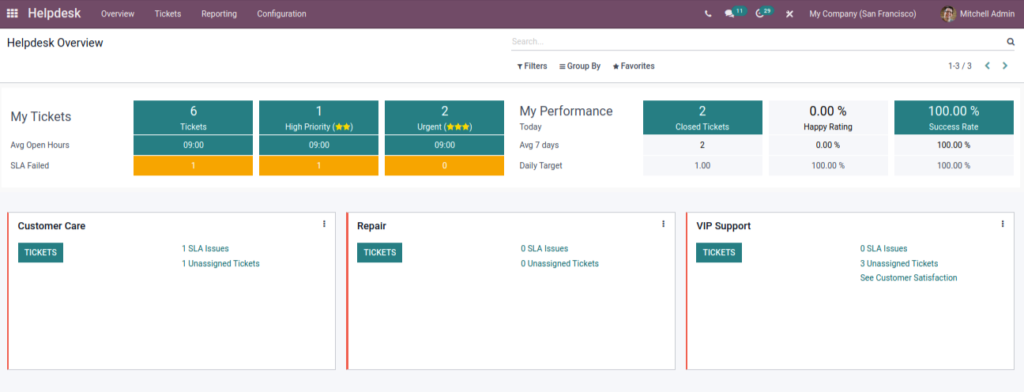
Let me point them out.
Here,
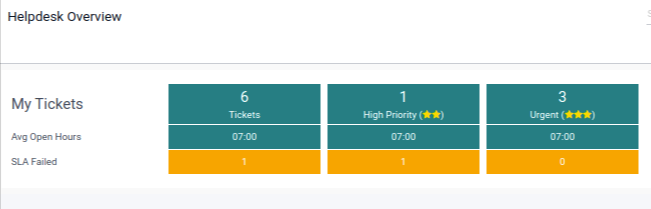
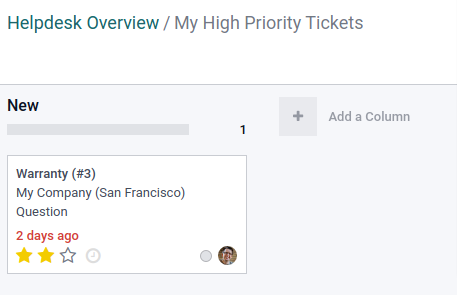
- My Tickets are the tickets assigned to me, pretty much self explanatory.
- Average open hours is the average amount of hours the tickets have been open. You can also see the high priority and urgent tickets.
- There is also a shortcut feature so you directly jump to the tickets to save time. For example if you click High Priority tickets, you can jump to high priority tickets.
On the right are my KPI ( key performance indicator ) measures.
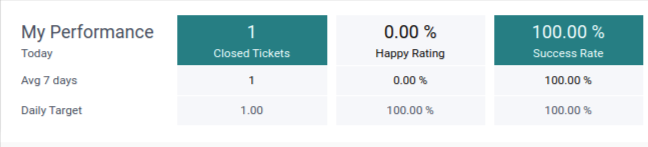
- Here the Daily target is set by oneself. You can increase it for more challenges.
- And below are TEAMS appointed for different tasks or services.

Moving on.
- We have TICKETS in the menu. We can either choose My tickets, that would only show the tickets assigned to you or All tickets which will show all the open tickets regardless of the team.
Let’s go to All tickets. I would like to point out some really convenient features about grouping and sorting tickets.
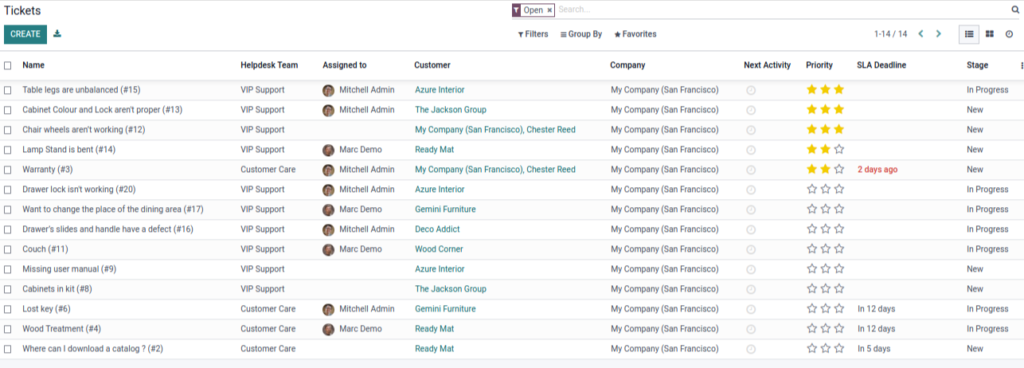
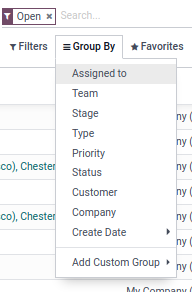
It has two main filter options. GROUP BY and FILTERS.
- Using groups you can group tickets based on some specific criteria for example group tickets with the same team, or one’s on the same stage and so on.
- You can also create your own grouping criteria based on the requirement on the fly.
Going one step further.
After creating your own filter option, save it to favourites so you don’t have to create it every time you want to access it.
- You can also create ticket types from Configuration. That will be helpful in grouping the tickets.

- The other option is FILTER. Here, you can view the tickets that pass the set standard or rule.
- For example you can view tickets with the same priorities or just the unassigned tickets together.

Now let’s talk about the Teams . Let’s assume my company is expanding and I need to make a new team. I will call it alterations.
While making a team there are certain options available for various functionality. We will discuss those in detail.
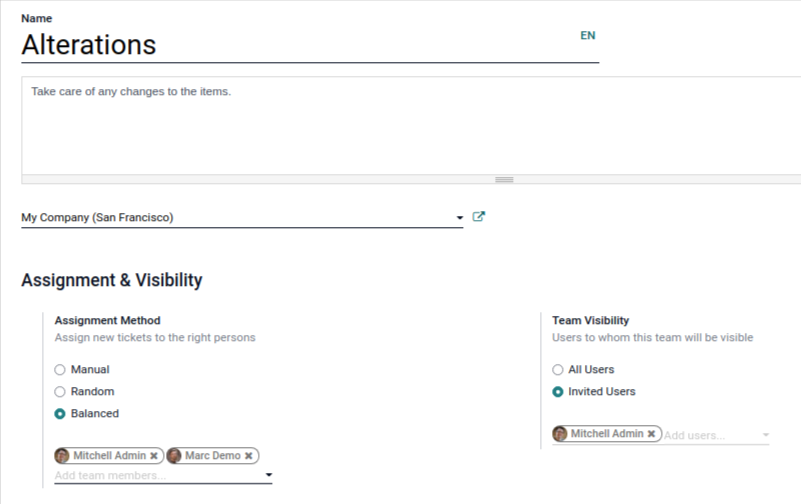
There are three methods for ticket assignment under Assignment Method:
- Manual : Here the tickets are assigned manually to team members. This allows employees to manage their own workload and target tickets they are good at.
- Random : In this method the tickets are randomly assigned and everyone gerd the same amount. Here all the tickets are assigned automatically.
- Balanced: Here everyone gets the same amount of tickets. The person with the least amount of tickets is assigned a new ticket so that everyone is assigned work fairly.
- NOTE:
- For the Random and Balanced, you can assign to which team members the tickets will be assigned. If it is left empty all the members will be included by default.
- Same can be done with the visibility feature. You can manually assign who can access or see the team’s ticket. If left empty, everyone is included by default.
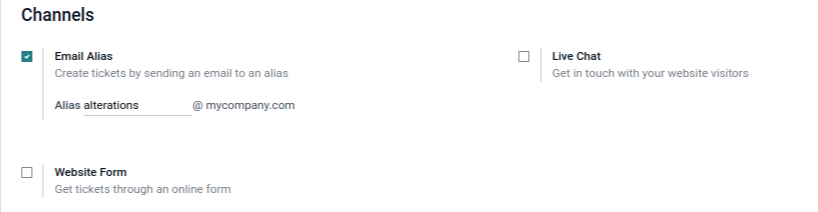
Below these we have an option to create an EMAIL ALIAS. So people can create tickets by sending in email to the name defined as an alias. Here I will put it as alteration.
Let’s save this for now. If you go back to the dashboard, you will be able to view a new team there.
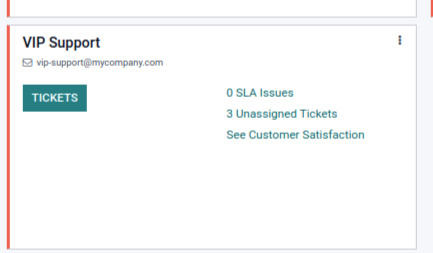
Now we will talk about tickets. Here on my VIP Desk team there are 3 unassigned tickets.
Now once you click on tickets, you will move to a kanban view page. All the tickets are separated depending on their level of progress known as STAGES.
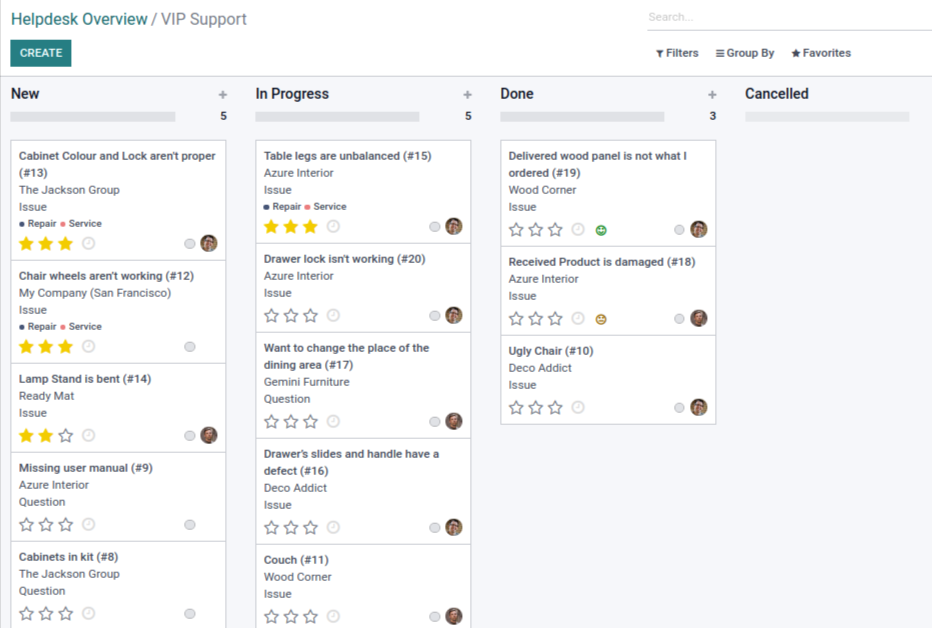
As you can see there are different stages to track the progress of the ticket. All the stages are absolutely customisable.
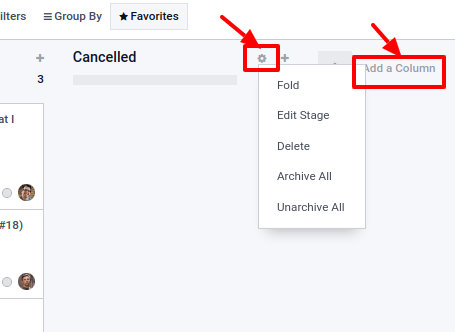
You can add a stage by clicking on the add a column button. You can drag and drop it to manage the sequence.
There are different options that you can edit. You can access them by clicking on the tiny clog symbol.
By clicking on the edit stage a pop-up will open, as shown below.
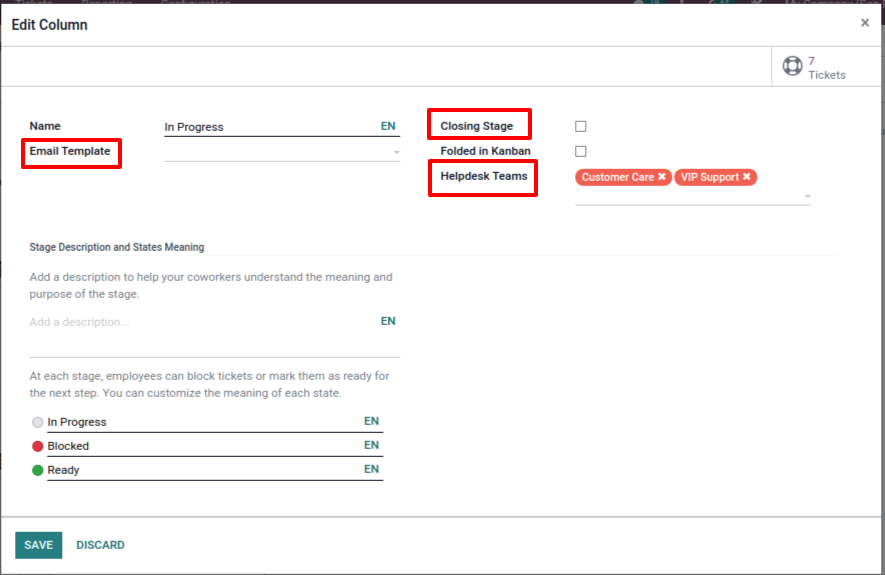
Let me explain the terms in depth:
- Email Template : The email template is a pre-made email that would be sent to the customer as soon as the ticket would make it to this stage.
- Closing Stage : By ticking this option, the respective stage will be assigned as the final stage. Here the ticket will be closed.
- Helpdesk team : By this option, you can assign to which teams this stage would be available. By doing so you don’t have to specify the same stages again and again.
Moving on to the tickets :
Let’s click on a ticket that hasn’t been assigned.
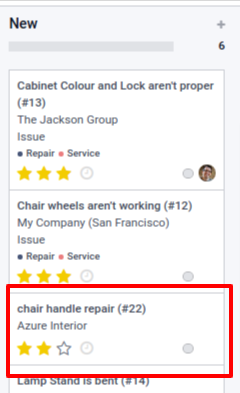
Here’s what it would look like :
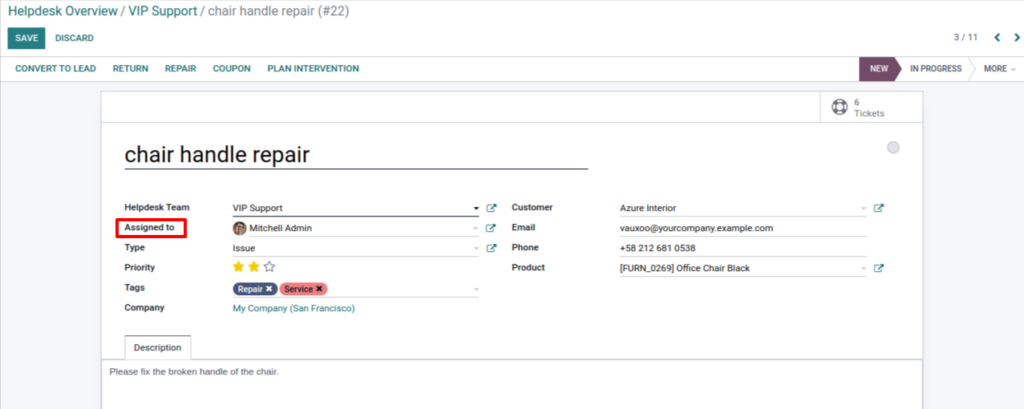
Here you can select who it will be assigned to, team assignment, priority, tags, any internal notes and more.
On the right there is a Chat, which shows the progress in the project. You can also login a note and tag some other employee you want to send a message to. It’s really easy and convenient.

Now let’s assume that we have started to work on the ticket. SO the ticket can be mobbed to the in-progress stage. You can select the in-progress on the top right status bar.
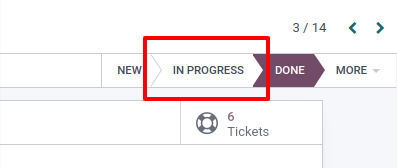
Or you can change the stage by moving it in the kanban view too.
- Automated Emails :
From Configuration -> Stages
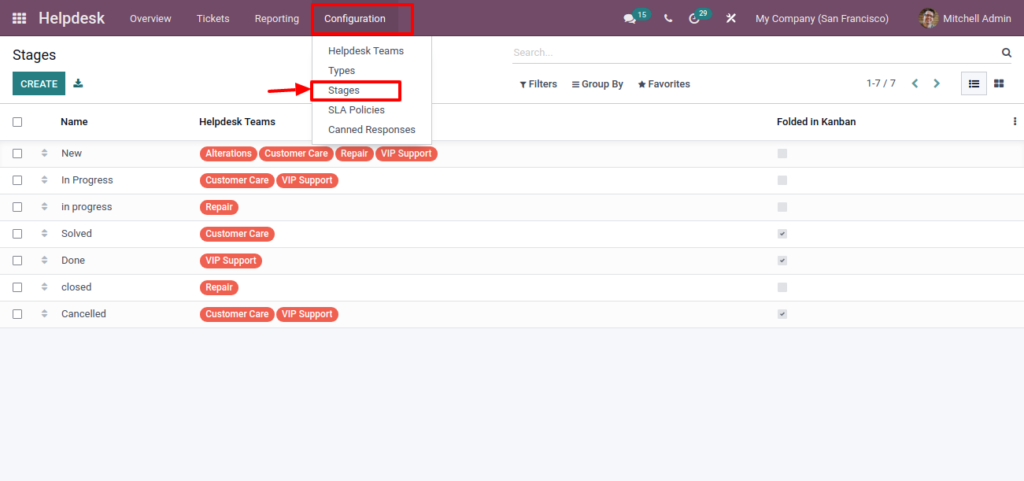
Here you can add or edit stages here and can configure emails that would be sent to the customer once the ticket reached that stage. For doing so click on the stage.
Here I will click on the solved stage. Here Helpdesk teams are the team on which this stage would show.
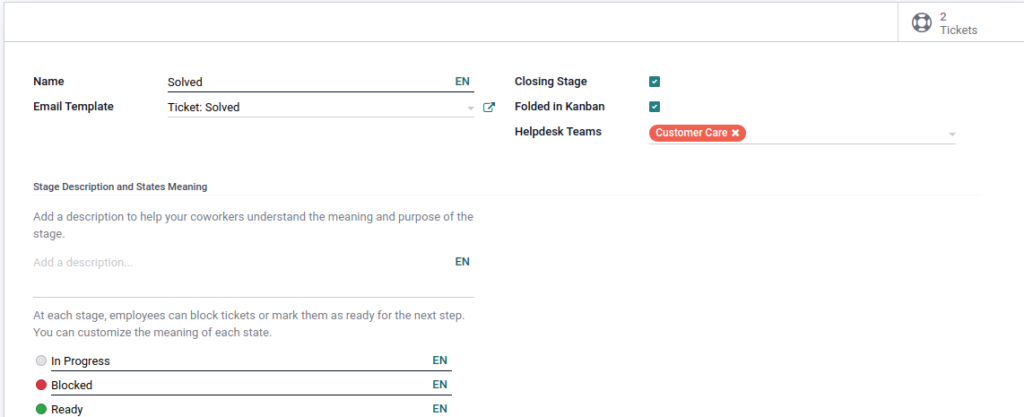

Here on Email template click on the tiny pop out arrow.
This screen will come.
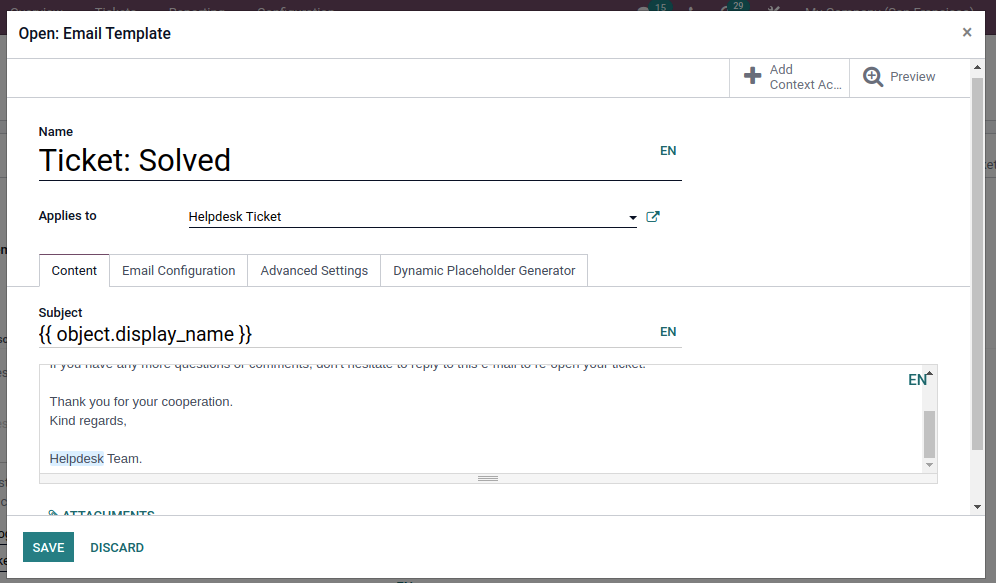
Here you can edit the content of the email. And can also apply dynamic placeholders.
This was it for this blog, you can find more information about SLA and receiving tickets in our upcoming blogs.
Thank you.