Odoo offers multi-channel support which means our customer can contact us from a variety of channels. It is great because we can have all of our customers’ interaction across different channels coming together in one place. And we allow our users to choose the right channel for themselves.
In order for this to happen we will have to select a few options that would allow our customers to contact us.
- EMAIL ALIAS
From the Configuration menu on Helpdesk app, go to helpdesk teams.
Helpdesk app -> Configuration -> Helpdesk teams
I have selected the REPAIRS team.
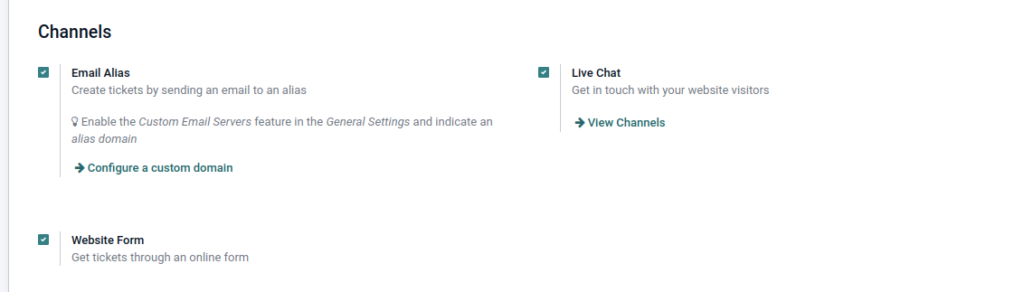
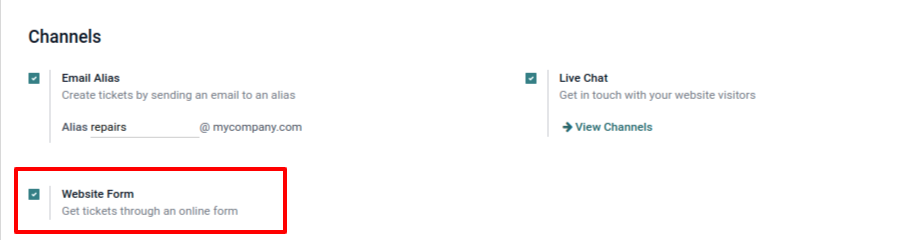
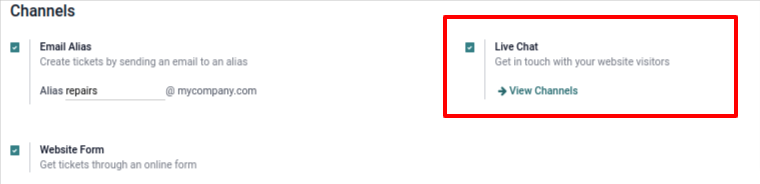
Scroll down below until you see the Channels option.
Below that make sure the Email Alias is selected. As well as Website Form.
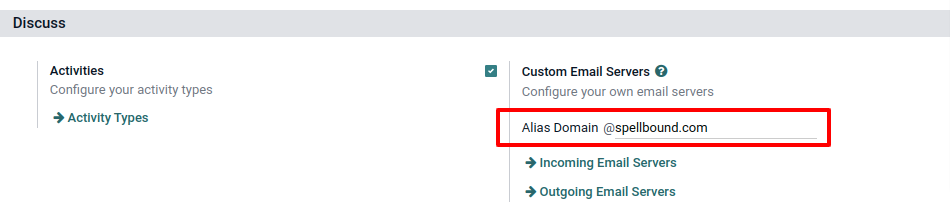
Now if you don’t have your email alias configured like me. We can do that in a jiff. Click on the “ configure a custom module” option provided here below the Email alias option.
It will lead you to a setting page.
There under Discuss, select Custom Email Servers.
Type in the server name of your choice.
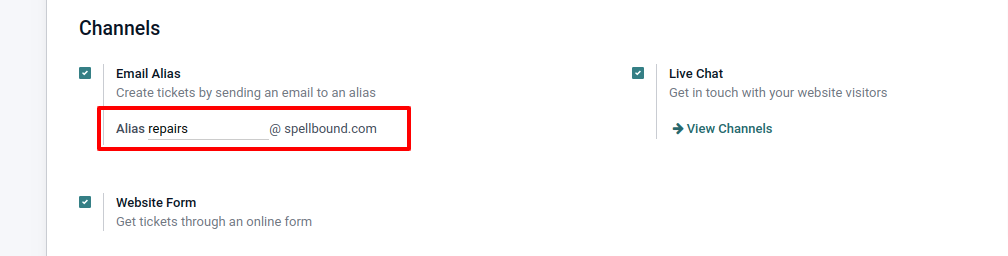
By doing so there would be an email alias present in the team edit view under Channels as below.
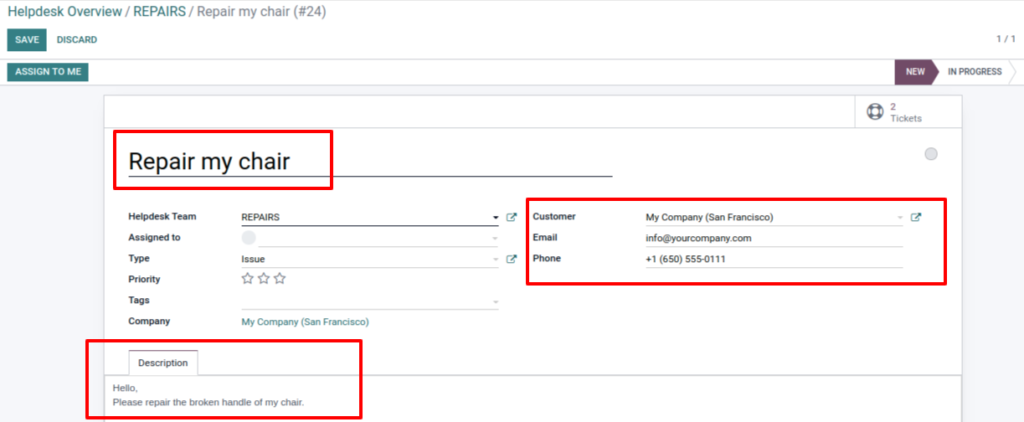
Now let’s see what happens when I send an email with this email address.
I have sent an email with the title ‘Repair my chair’.
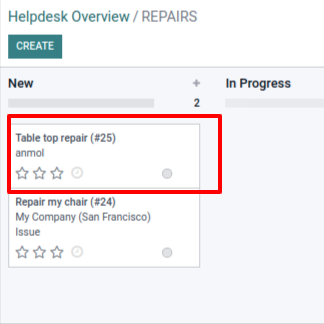
It will be automatically created in a ticket under the REPAIRS team at the New stage.
Here the title of the email will be the title of the ticket.
Email body will be in the description of the ticket.
The email address and other information of the customer will be directly fetched. And we already have the customer in the odoo database then odoo will automatically add that information for you.
- WEBSITE
The customer can also create a ticket through a website. For that select the website form under channels in the edit team.
As soon as we select this website form button, a new button will appear on the top right corner.
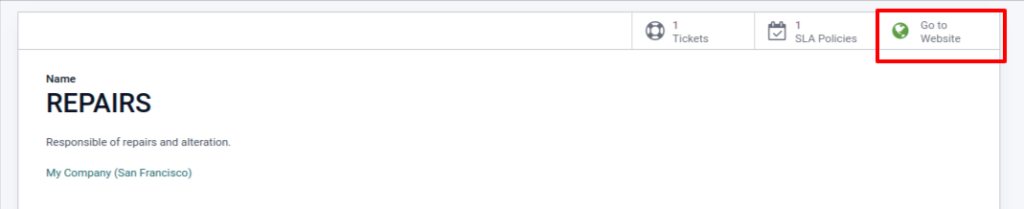
By clicking on it we can jump to a website where our customers will submit their tickets. 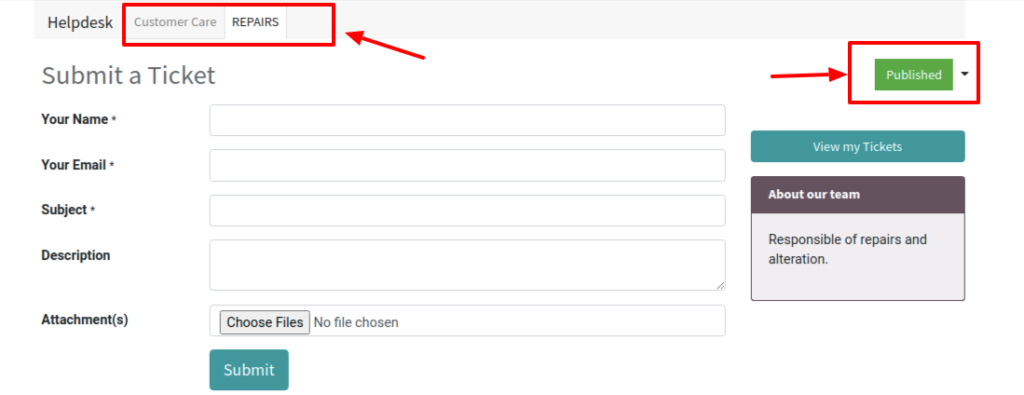
Here I have already published it on the website. You can select the tiny drop down arrow to its right and publish it in a click.
Now on top you can see there are two tabs because both these teams have website form selected.
Let’s fill in the information and see what happens.

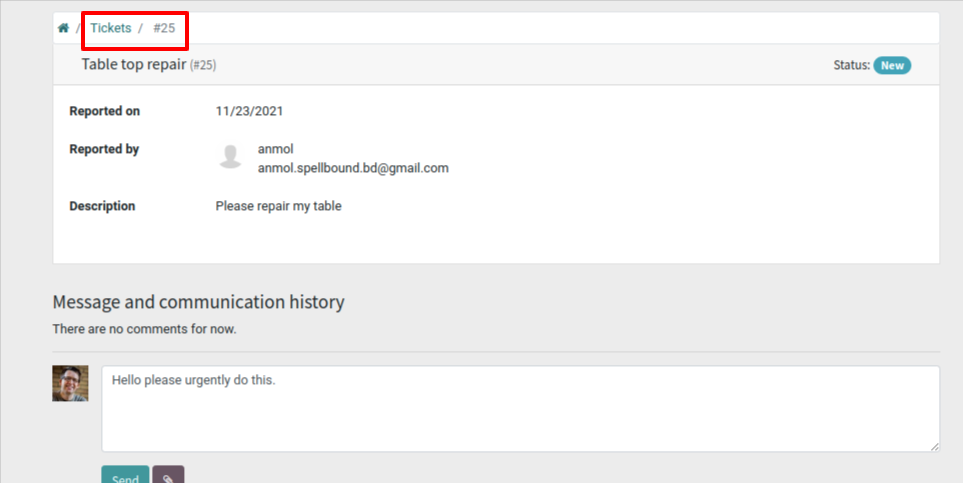
By clicking on your ticket number, a review of your ticket will open. You can also send a message from there.
Now let’s go back to our helpdesk app.
You will find a new ticket generated in REPAIRS team.
Let’s open it.
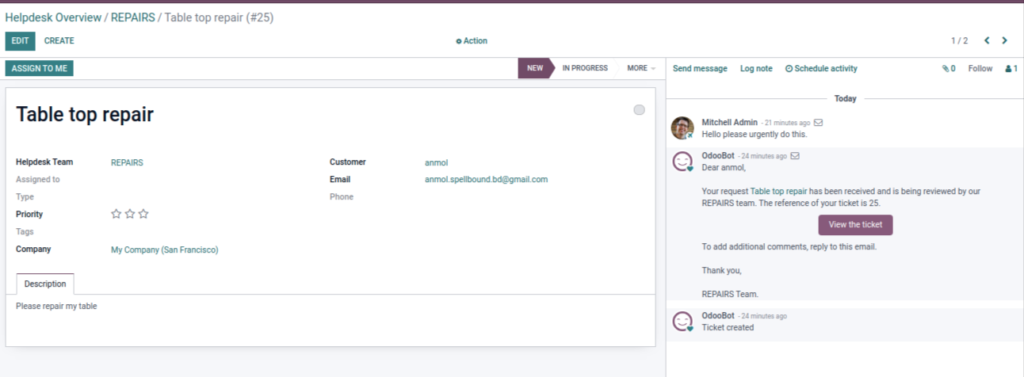
Here on the left is the details about the ticket while on the right shows the progress about the ticket and also any message the customer has sent us.
- LIVE CHAT ON WEBSITE
Now we can also create tickets from live chat as well. For this check the live chat option selected under channels in the edit team.
Once this is activated we can set up our channel.
Click on the View Channels below it.
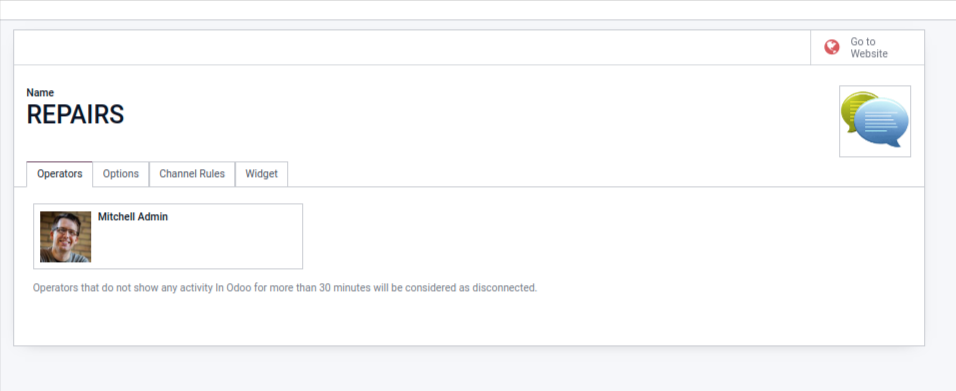
Here in the channel rules you can add rules. And from the operators you can see who is the part of this channel.
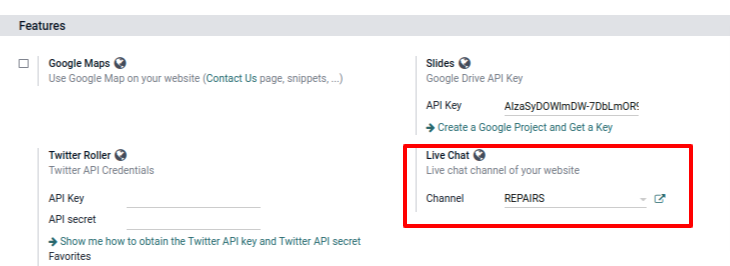
And before we get started I want to make sure that I have this channel on the setting of my website application.
Website -> Configuration -> Settings
On the settings page scroll down to the live chat section and make sure we have this channel selected on the live chat channel.
Now on the website a tiny pop up chat box will be there.
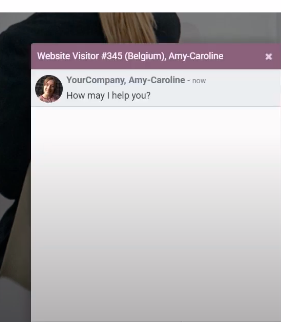
Now when you go back to your odoo website. You can see the message pop up. From here you can directly generate a new ticket by typing /helpdesk followed by the title you want to set on the ticket.
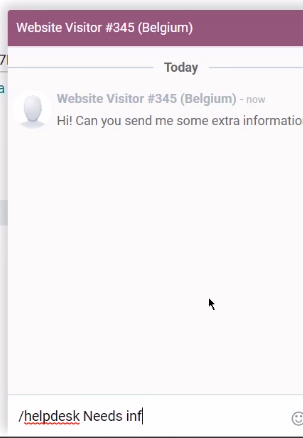
A new ticket will be generated just like that, and you can access it information from there.
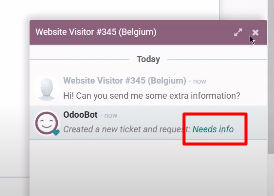
Now on the ticket the needed info will be your title. All the customers info is fetched from the website and the messages will be shown in the description below.
This was it for this blog. Hope you learned something new today.