The POS app allows us to personalize a birds eye view of a restaurant and register all payments from customers simply by clicking on their table. By doing so it won’t only lead to time save but will also help avoid any possible lack of organisation between team members. So the waiter won’t be running from table to table like headless chicken anymore. Odoo POS for restaurant has also incorporated various awesome features to make the restaurant order management t process seamless.
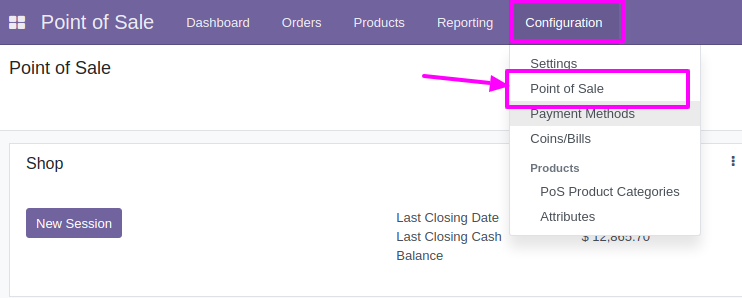
- In the POS application let’s open our restaurant or bar. In the configuration go to the point of sales, and to create a new restaurant or bar we simple have to create.
- CONFIGURATION -> POINT OF SALES -> CREATE
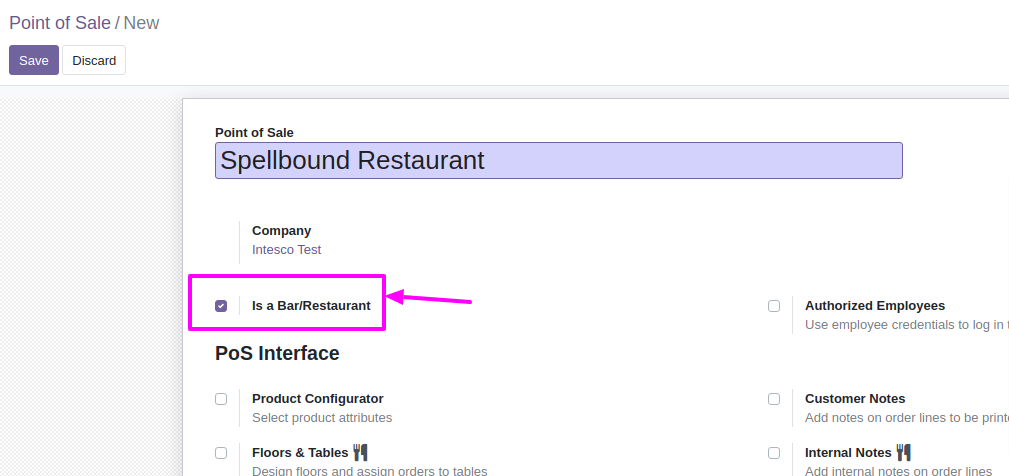
- Make sure the ‘IS A BAR/RESTAURANT’ option is activated. This will allow us to activate some specific features to a bar/restaurant that are really useful.
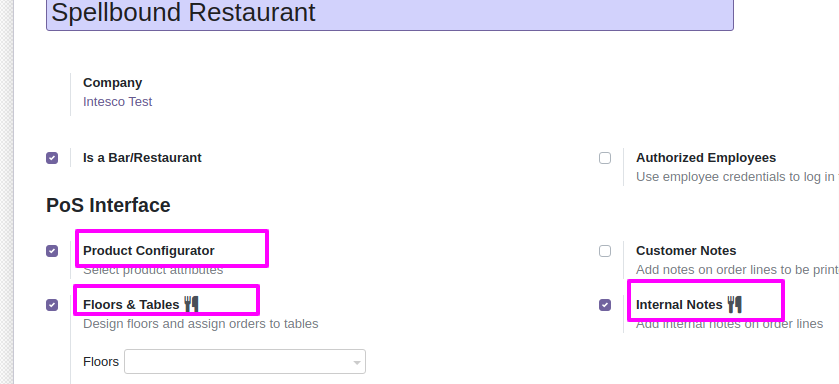
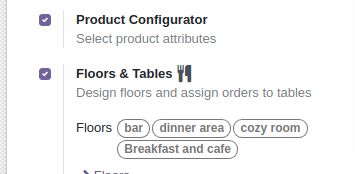
- Here I have ticked PRODUCT CONFIGURATOR to select product attributes, FLOOR & TABLES to design the floor plan which we will discuss later in this blog and INTERNAL NOTES to add internal notes to the order line, pretty self-explanatory itself.
- In the FLOORS & TABLES option you can define different areas or rooms in your bar or restaurant. Here I have defined three areas namely Bar, Dinner area and Cozy Area which is like this mini library kind of ambiance. You can define as many areas as you want depending on the area allocation of your restaurant/bar.
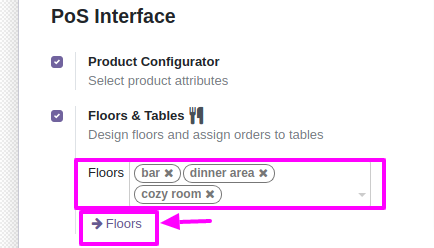
- Now on clicking on the FLOORS you can view all the floor that you have created. With the help of this functionality you can add or remove any area depending on the changes of your arrangement. May it be the seasonal change in interiors or due to renovations.

- Here you can add a floor by just clicking on the CREATE button on top left.
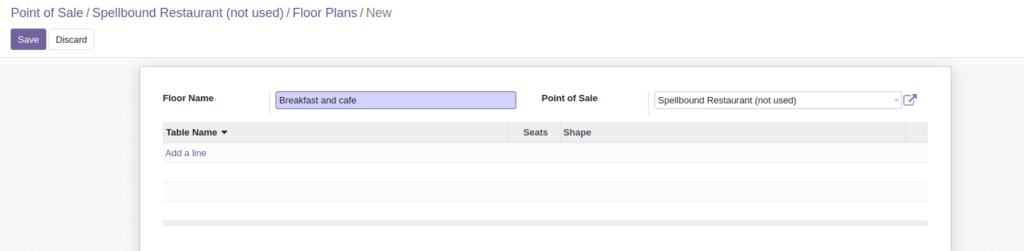
- Let’s say my restaurant also serves breakfast and cafe during early hours. You can add the tables and name it too. Like I have done it here.
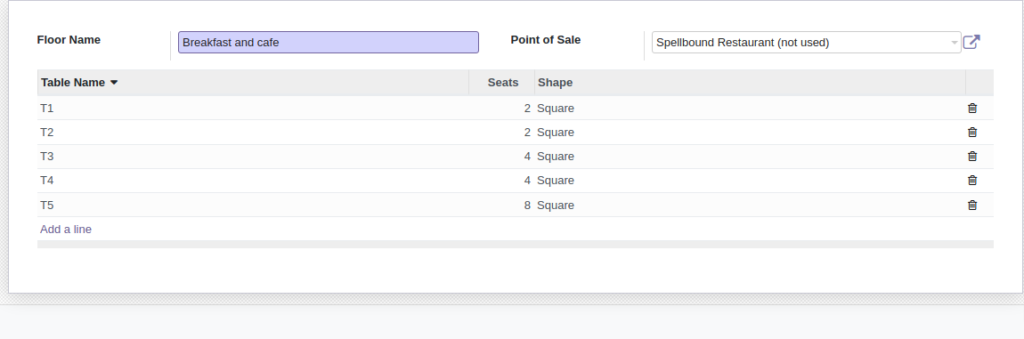
- And by saving this, when you go back you can see the area is added.
- Now as for options below, there are tons of other very useful options, but we won’t deep dive into that for now. But I would like to mention about the few really important ones.
- Like adding HEADER & FOOTER in your bill. BILL SPLITTING in case some customers want to split bills and pay only for the items they have ordered individually, BILL PRINTING as we want to provide the bill to our customer before they pay, that’s the standard , and invoicing in case a customer asks for the invoice.

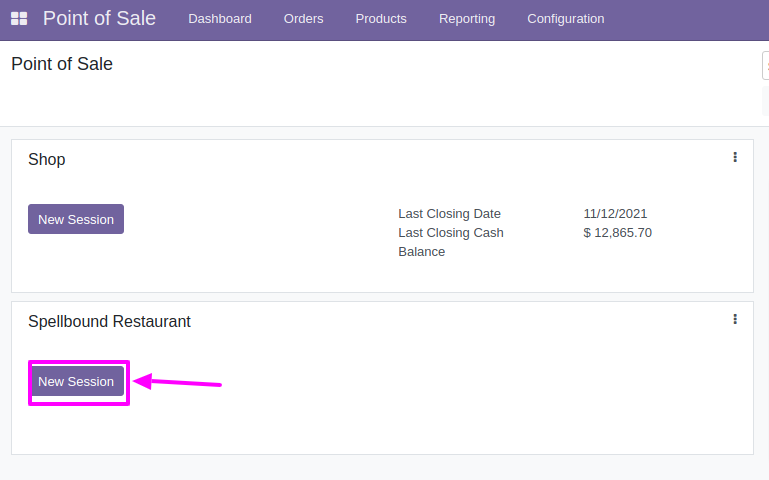
- Once we have all these nice features saved, let’s go back to the dashboard and start a NEW SESSION for the Spellbound Restaurant.
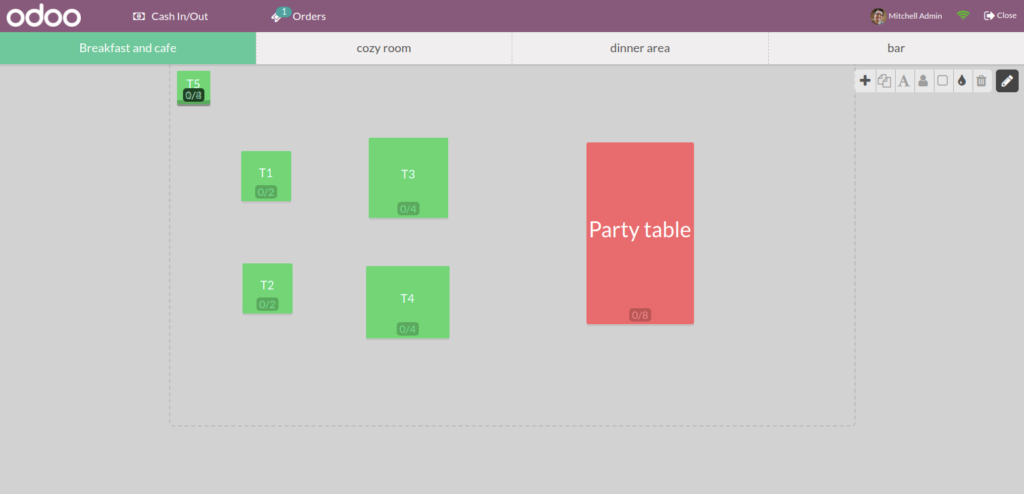
- Once it’s loaded the first thing we will see is the screen is your floor area layout.
- The box on the top left corner is the editing option box.
- Here a different screen is available depending on the area that you have mentioned before. Like here for me it is Breakfast & Cafe, cozy room, dinner area and bar. You can create a different layout for each of this area to get an accurate birds eye view as per your restaurant or bar. You can see here I have created the tables as per my cafe table organisation. I have color coded the large table since it is pre-booked. I have also changed the name of the large table.
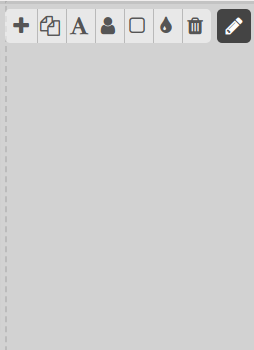
+: To add a table
Two page symbol : copy a table rather than creating again
A : To add text
Square: The shape of the table
Drop : Color ( to color coordinate tables in order to differentiate)
Bin : to delete
Pen : to enable editing option
- When you don’t have any tables selected you can change the background color if you want to. I have not done that because I am quite satisfied by how my layout has turned out.
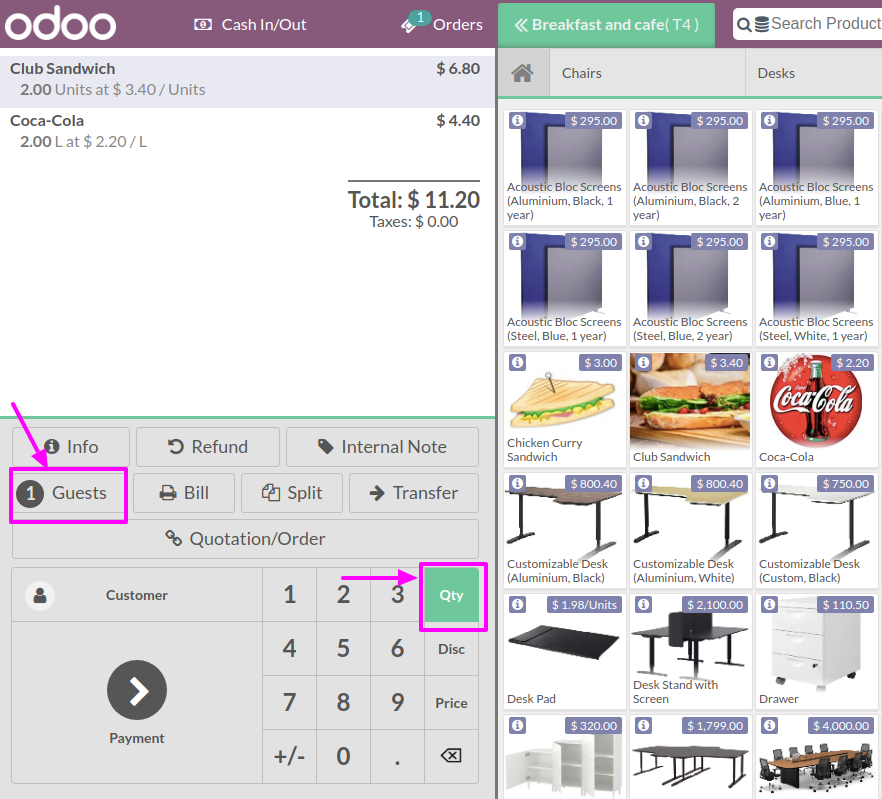
- Now let’s assume we have customers and we sat them on table T4.
- In order to place the order just click on table T4. They ordered a sandwich and a cola.
- Just click on those items and they would be added. You can manage the quantity from her itself. And also define how many customers are there.
- Now the customer is ready to pay. Click on the table again and you will go back to the order.
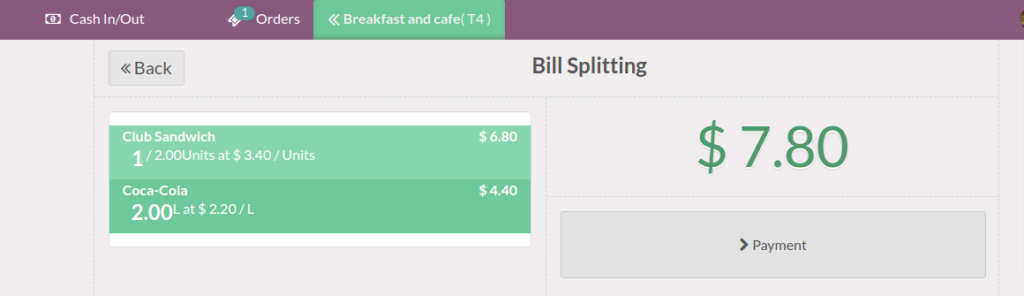
- There are 2 guests and they would like to split the bill. Click on the Split button. Let’s say one customer would pay for a sandwich and a cake. While the other just for the sandwich.
- Now proceed toward the payment.

- Select the type of payment and validate.
- Once you are done with that you will be led back to the table layout screen. There once again click on the same table and there would be one sandwich in the bill. Follow the same process again. In this way you can split the bill for multiple customers.
- Now suppose you have to transfer a customer to another table due to whatever reason you can do so without much hassle.
- Let’s assume the customer sitting on table T1 wants to be shifted to T4 since they have a door draft. And they had ordered a club sandwich.
- Select transfer.
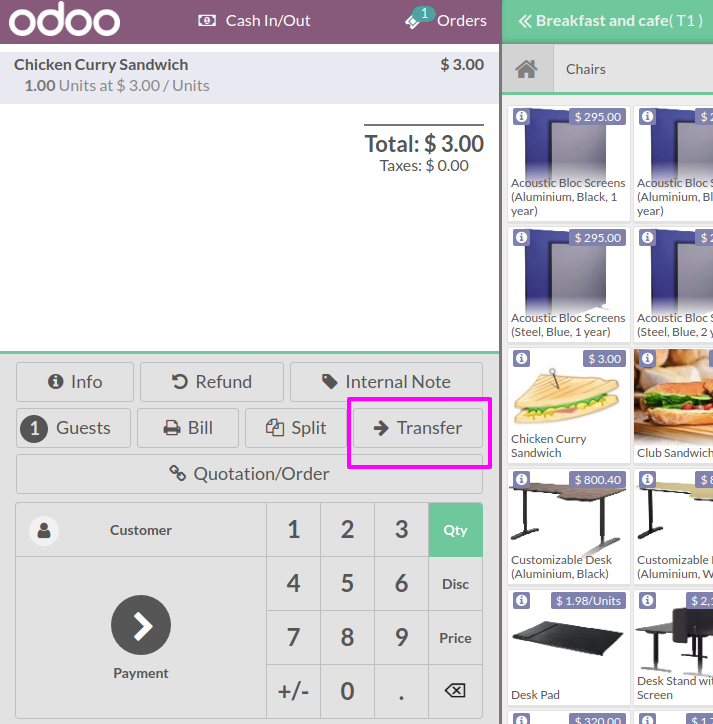
- It will lead you back to the table layout and you can select the new table. The order will be transferred just like that.
- From INTERNAL NOTE you can also add any note for your waiters and cook.
- Now let’s assume it’s the end of the day and you want to close the shop. Just click on the close button on the top left corner.
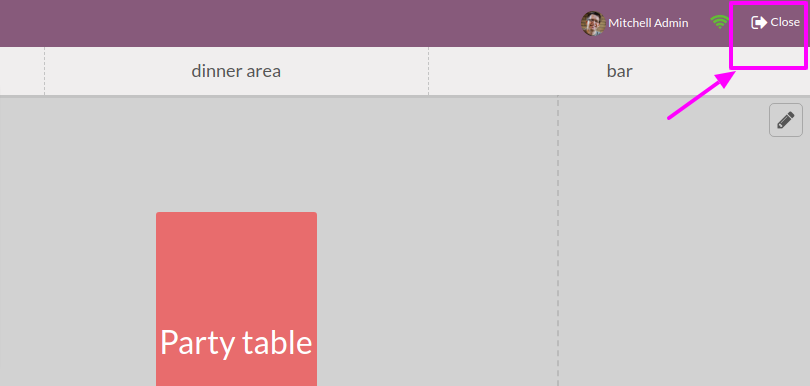
- You will go back to Dashboard. And you whole session for the day would be logged.
- This was it for the blog. Hope you learned something new today.