In the ever – evolving world of retail , businesses are constantly seeking innovative solutions to streamline their operations and enhance the customer experience. With the release of odoo 16 , an all-in-one business management software suite , the retail industry has been to a powerful point of sale (POS ) system that is set to revolutionize the way business manage their sales process .in this blog post , we will delve into the key features and benefits of Odoo 16’s POS system and understand how it can transform retail operations .
Dashboard
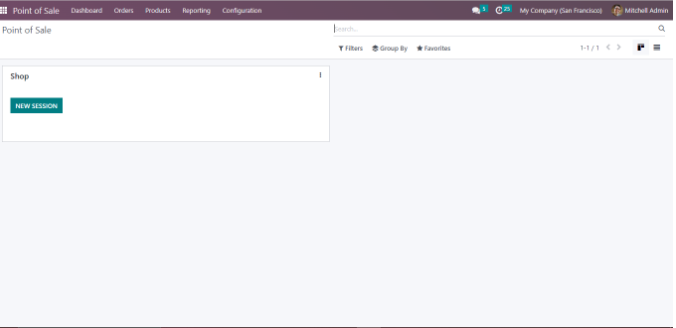
From the Odoo 16 Point of Sale module dashboard you can view the existing point of sale session. The Last Closing Date, Last Closing Cash and Balance are mentioned along with their names.
New Point of Sale sessions can be created as required by the company .Click on dashboard configuration, go to the setting and click on the + new shop .
Dashboard → Configuration→ Setting → + New Shop
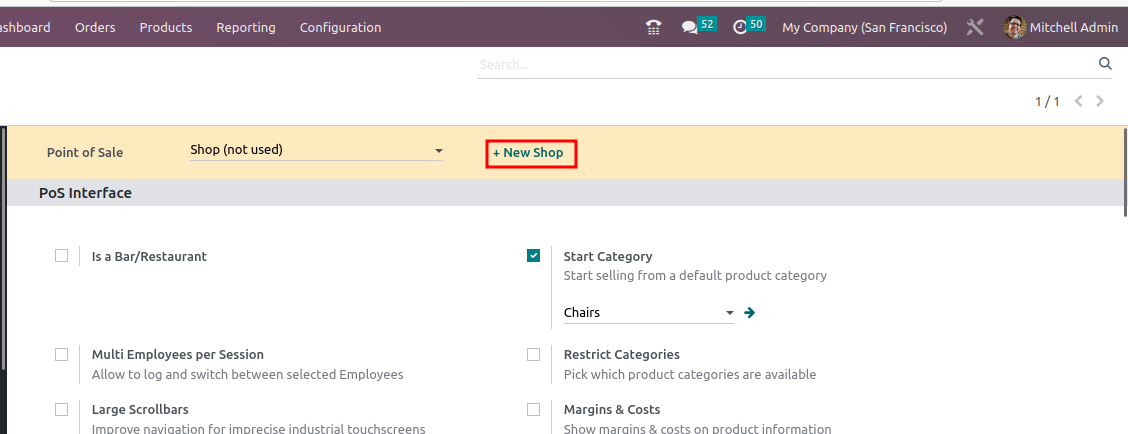
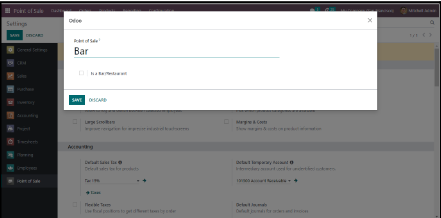
Add a name for the point of sale.
Bar/ Restaurant: If the checkbox is enabled, the point of sale is a bar or restaurant, or the point of sale is a shop
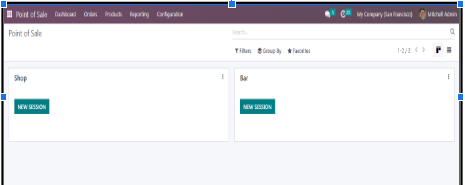
Let’s see how orders are taken and recorded in the Odoo POS module. You can select the NEW SESSION from the Point of Sale located on the dashboard
Seamless Process of Add Products to Cart
Odoo 16’s system simplifies the sales process , allowing retailers to serve customers more efficiently . The intuitive interface enables sales staff to quickly locate and add products to the customer’s order , reducing checkout time and enhancing the overall shopping experience.
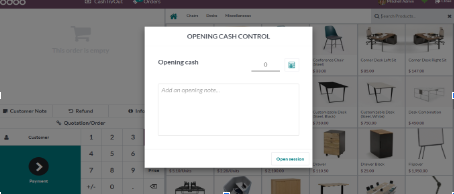
As soon as you enter into the new session, a pop-up will appear to set an opening balance at the PoS cash box.
Now, you can click on the Open Session button to start the session.
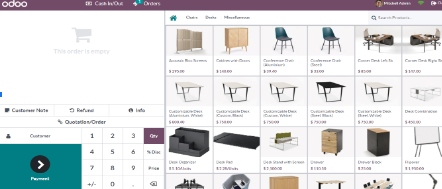
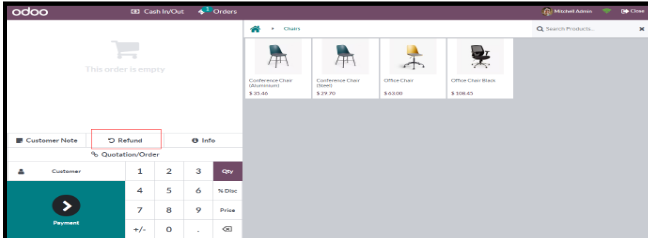
Upon selecting the new session option, you are directed to the order interface. Products are displayed with their price, image, and name, categorized for easy selection.

Orders are shown on the left with unit price, quantity, and total amount. The order summary includes subtotal and taxes. Enable Customer Notes for order-related notes and the refund option for returns. To process payments, select the payment button and choose the payment method.
Customer Handling
When selecting a payment method, you have the option to choose an existing customer or create a new customer. Here’s an explanation of how this works:
Payment Method → Customer → Select Existing Customer / Create New Customer
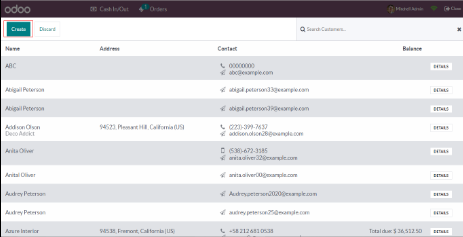
If the customer making the purchase is already registered in the system, you can select the existing customer option during the payment process. This allows you to associate the sale with the customer’s profile, enabling easy tracking of their purchase history, loyalty program status, and other relevant information.
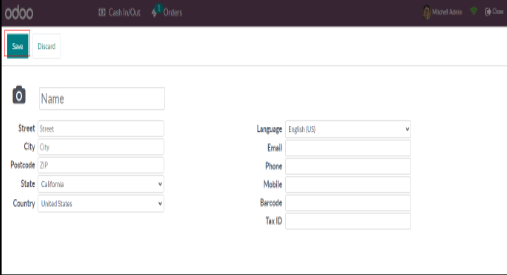
In cases where the customer is not yet registered in the system, you can create a new customer directly from the POS interface. This option allows you to capture the customer’s details, such as name, contact information, and any other relevant information you require. By creating a new customer, you establish a customer profile within the system for future reference and personalized service.
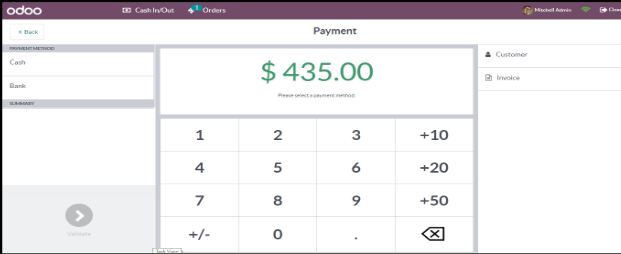
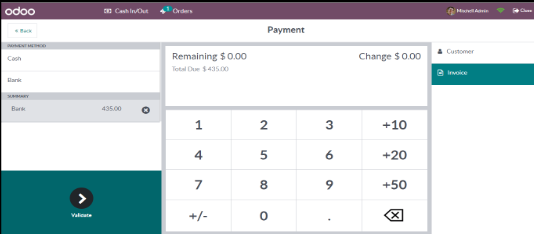
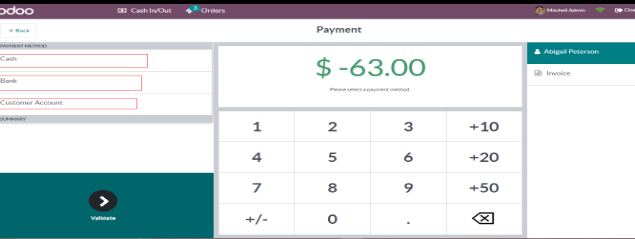
Flexible Payment Option
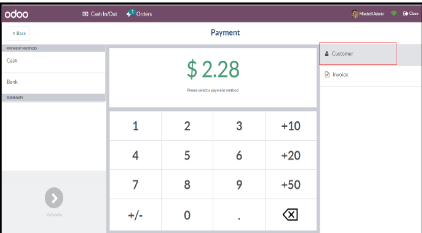
By selecting the payment button, you will be redirected to the payment screen. You can choose the payment method such as cash, bank or customer account. Enter the amount paid by the customer using the keypad. Select the Invoice button to generate the invoice. To validate the payment, select the Validate button.
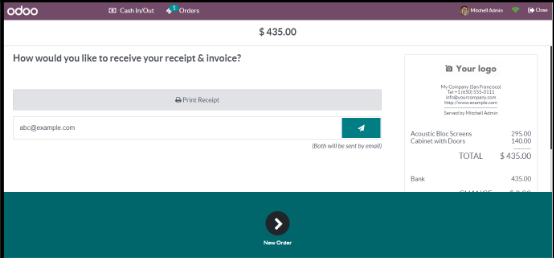
The Receipt will be displayed on the right side of the screen , print the receipt by selecting the Print button. Also , the receipt can be emailed to the given mail id.
Select New Order and it is redirected to New Order.
Processing Refunds
To Initiate a refund , Start by identifying the order or transaction for which the refund is requested.

Refund Option :
This can be done by locating the relevant order in the POS system,through order number or customer name . Odoo 16 POS offers flexible refund options.

You can choose to refund the entire order or select specific items for a partial refund. This allows for customized and accurate refund processing based on the customer’s request.
Refund Method :
select the appropriate refund method , such as cash , card , or store credit , depending on the customer’s preference and your store’s policies.
Close Session
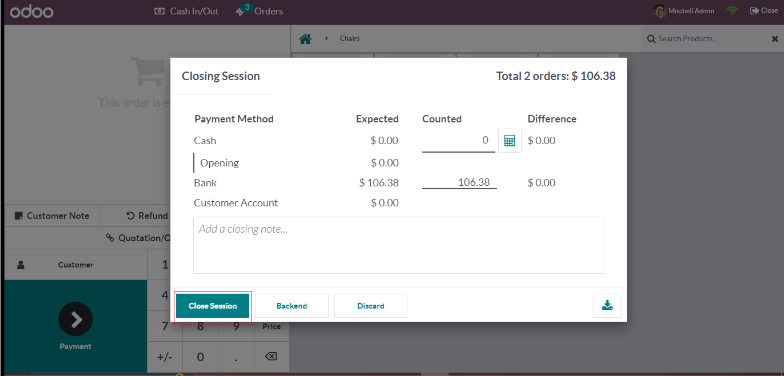
Closing a session in Odoo 16’s Point of Sale (POS) module involves the finalization and reconciliation of transactions made during the session. Once all pending orders are processed or canceled, the cash and other payment methods are counted and verified against the recorded amounts. Odoo compares the entered counts with the expected values and performs a reconciliation process. After confirming the counts and amounts, the session is closed, and the system generates comprehensive reports summarizing the session’s activities and finances. Closing a session ensures accurate record-keeping, facilitates cash management, and provides valuable insights for analysis and auditing purposes.
odoo 16’s POS system offers a comprehensive solution that combines simplicity , flexibility , and efficiency . Whether you run a small boutique or a large retail chain , this feature – rich system empowers businesses to optimize their sales processes and elevate the overall shopping experience for customers.